Support
Accounts Payable
- AP Overview
- Purchase Orders
- How to Create Purchase Orders
Brewery Inventory Management
- Activating the Brewery Inventory Module
- Creating Products and Recipes
- Importing BeerXML Recipes
- Quick Start Guide
- Inventory
- Adding Items to Your Inventory
- Batches
- Brewing A Batch
- Creating a Quick Batch
- Packaging
- Defining Packaging Groups
- Packaging Up A Batch
- Setting Up a Packaging Group (Can Flat)
- Setting Up A Packaging Group (Kegs)
- Advanced Options
- SKU Multiplier
Digital Menus
Employee Management
Integrations
Log Book
Scheduling
Settings
Team Messaging
Training
Inventory Overview
Your inventory list page contains items such as ingredients, consumables, containers, and deposits.
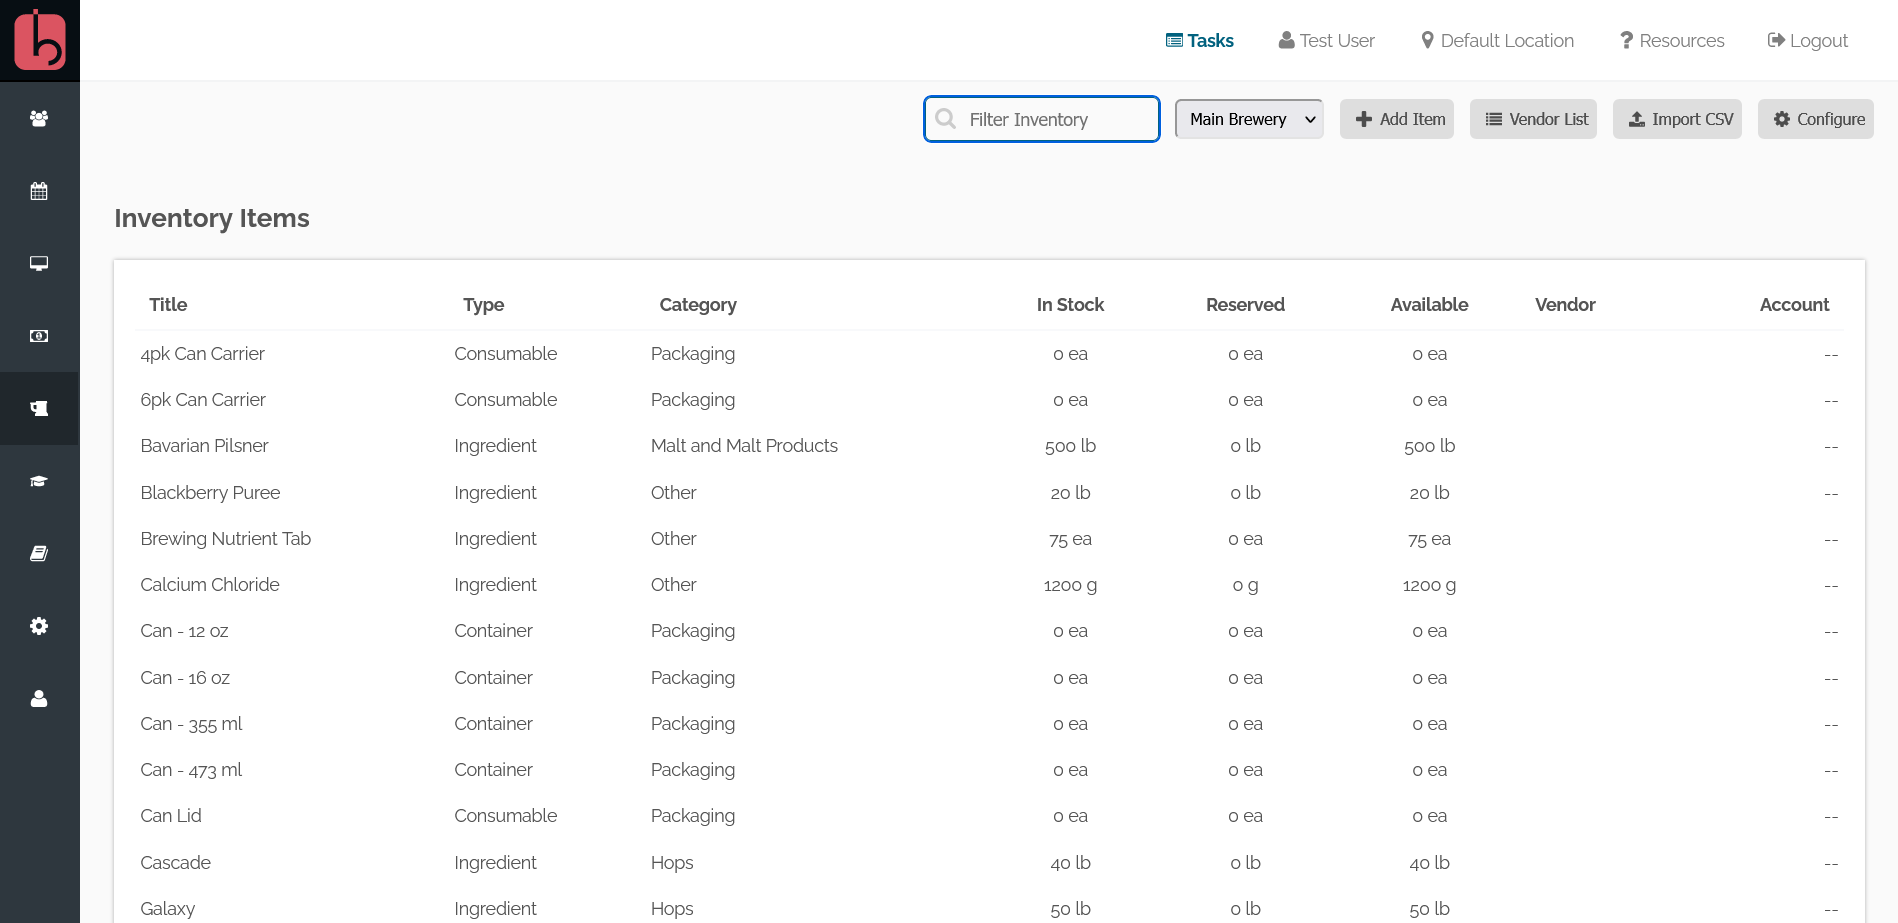
- Ingredients are used strictly for including in brewed batches (Hops, Malts, additives, etc)
- Consumables can be used for both batches (such as one-time use filters), or packaging materials like labels, lids, and caps
- Containers are only for use in packaging groups that will hold product volumes, such as cans, kegs, or bottles
- Deposits are for items 'sold' to customers with a refundable deposit, such as kegs or pallets
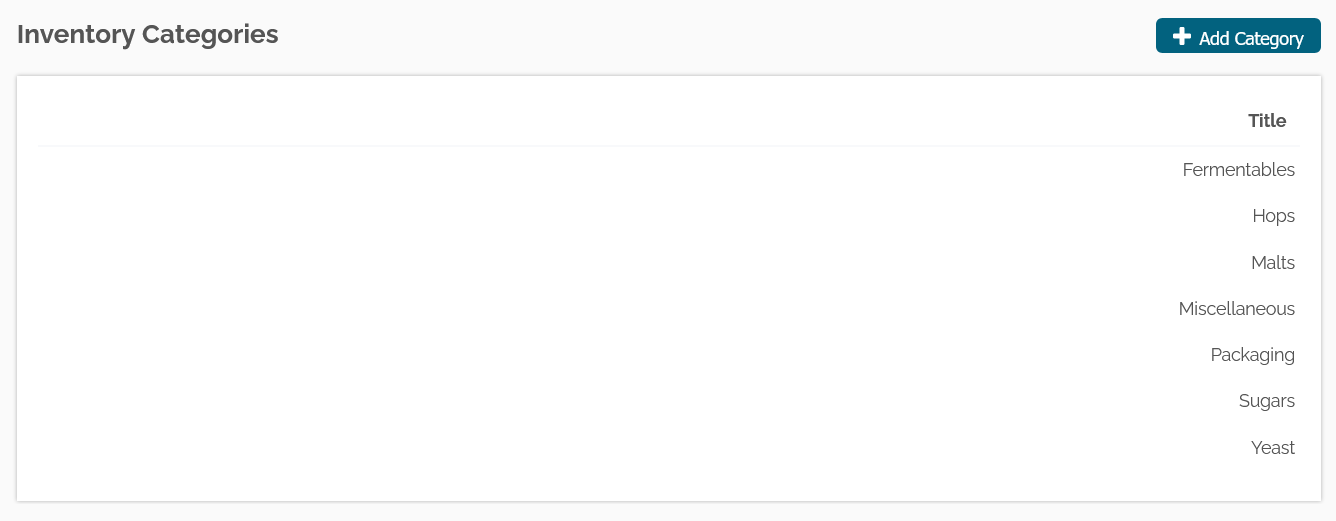
You can further group items by defining your own categories by clicking the Configure button. By default, we've included a few standard categories, but you are free to add as many as you'd like.
Importing Inventory
If you have a CSV file from your existing brewery management software, you can import the data into your BarSight account to get going even faster. Just hit the Import CSV button from within the inventory list page and you will see this screen.
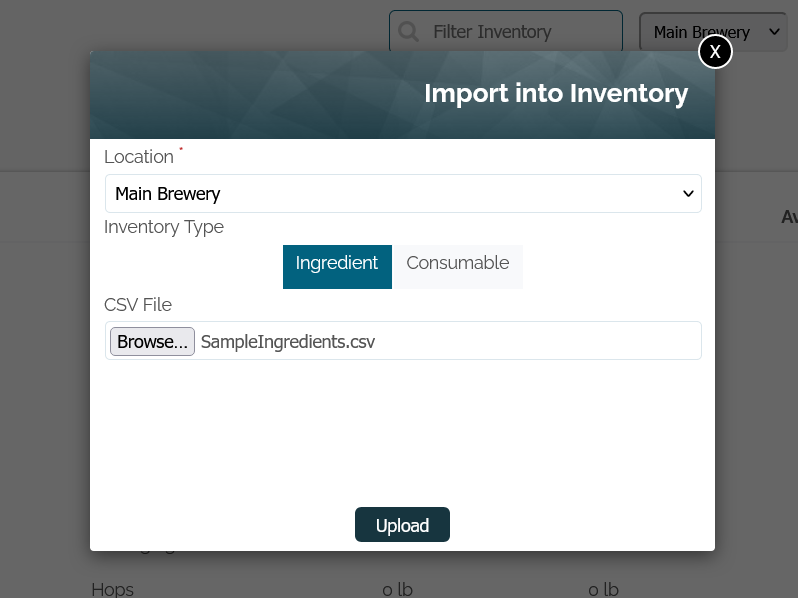
Make sure you select the proper location to import the items into and choose whether these are ingredients or consumables. After you select the CSV file, hit the Upload button to be taken to the next screen.
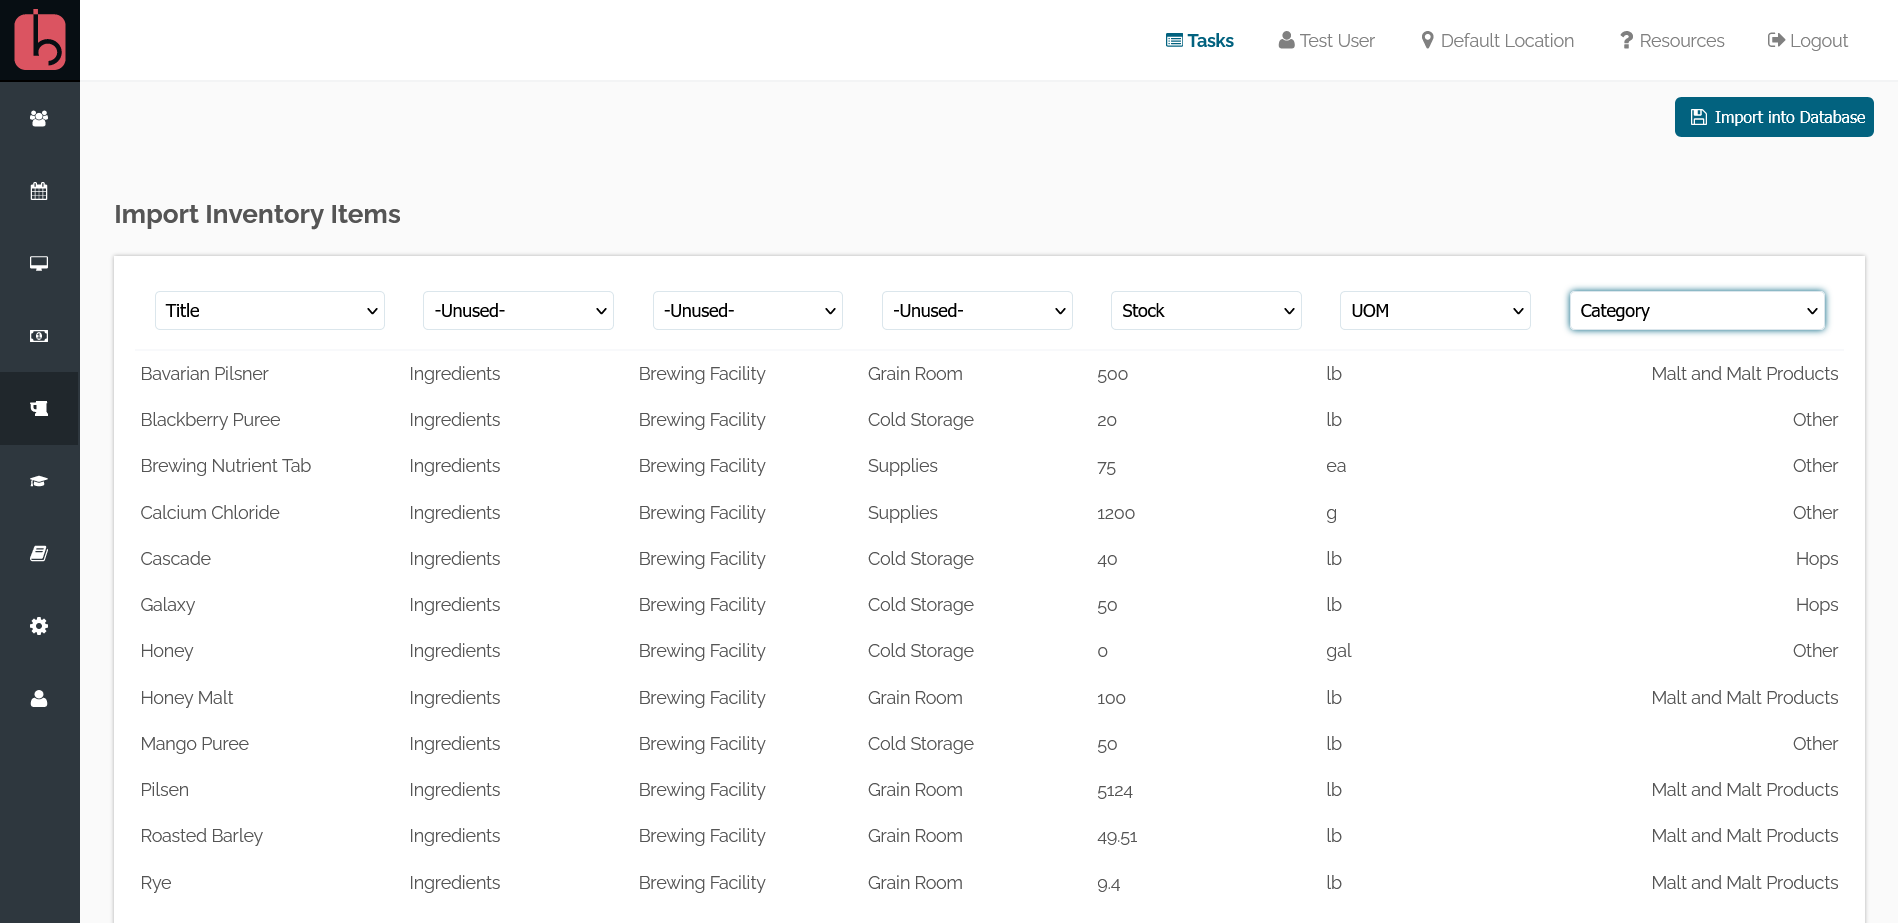
Our system will prepare the file and allow you to view the imported data and verify everything before it gets placed into the inventory. At a minimum, you need to define the Title, Stock #, and Units of Measure (ea, kg, lb) so BarSight can create the necessary items in the database. If things don't look right here, you can exit out of this page and make changes to your file and retry.
We have a sample import file you can download and use as a baseline to get your inventory setup. This sample import file has only a few of the necessary columns required. Additional columns, such as purchase price, taxes, and substitutions can be included, for an example of what that looks like, click the Download CSV button when on the brewery inventory page. The file downloaded from there will contain all the columns and options available for you to import into the system.
Editing Your Inventory
If you are editing existing inventory items or creating them from scratch, this section will help you know the ins and outs of the inventory form. The first box you will see is this one:
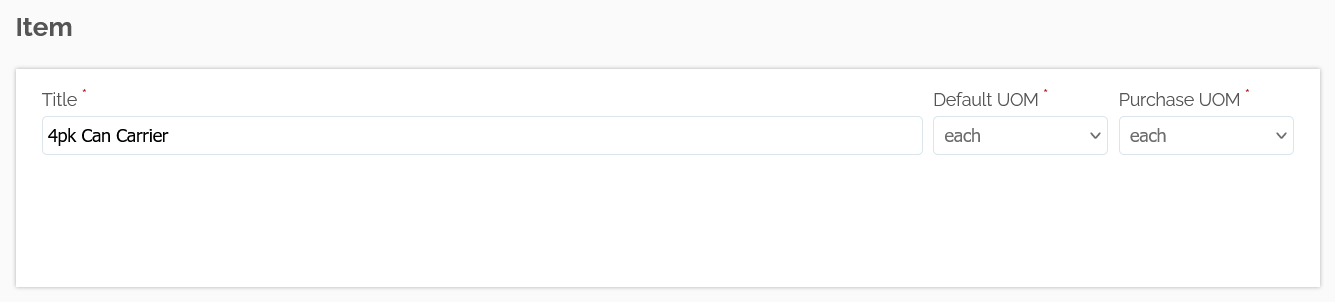
Almost self-explanatory, you have your item name, the standard unit of measure as well as the purchase unit of measure. The purchase UOM lets you define that you want to order an item in a bigger volume, like Pounds, but you typically use ounces within your recipes.
The next box is the inventory item setup:
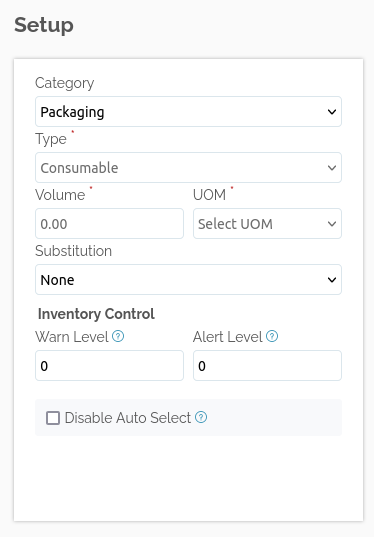
You can set the category that this item belongs to, set the type (Ingredient, Consumable, Container, Deposit) as well as the inventory stock alerts and warnings.
If you set this item to be a Container, you'll need to define the volume and UOM for this container, so our system knows how much product is to be consumed by this item when packaging. So for example, set this to 16oz for a 16oz can.
The Substitution option allows you to have 2 similar ingredients be displayed when you are brewing a batch. Instead of removing an ingredient, and then going to add another, you'll be able to see both in the list and make a substitution quickly.
For consumables/containers that you want to track accurately when packaging, make sure the Disable Auto Select option is checked. Otherwise, when packaging your beer, the system will automatically select the oldest to newest inventory in stock.
Next up we have the Purchasing and Resale setup for this item:
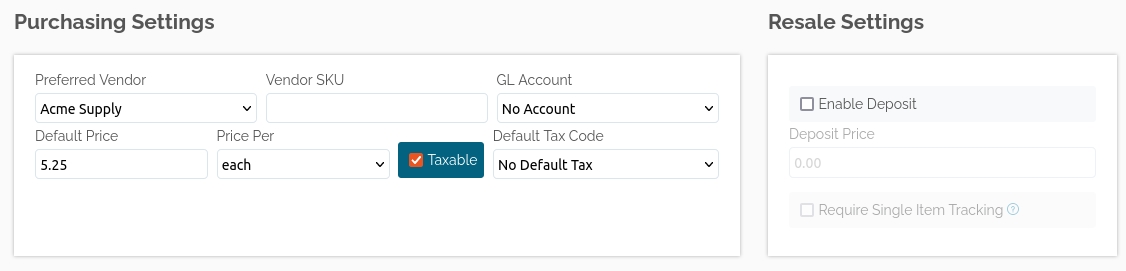
The Purchasing box will let you define the preferred vendor, vendor SKU, GL account, default price (and price per unit), and default tax code for this item. All of these configurations are optional, as they are only designed to make things easier for you while entering in data.
The Resale box is used for items that you will be selling to customers. This is where you can enable keg deposits, and even tap handle or pallet deposits. You can input a price for the deposit or leave it 0 if you just want to track the inventory movements.
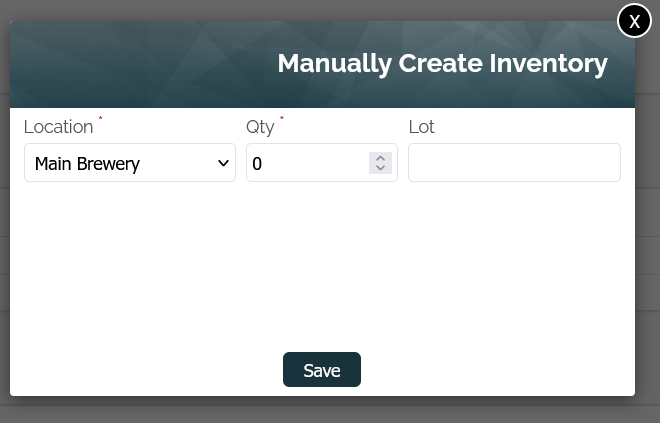
Inventory Stock Management
You can manually create inventory, transfer items between locations, and update inventory counts from within the inventory item. We recommend taking an initial inventory count, and uploading that to start by using our Manual Inventory Count button, or by importing your inventory with the stock counts already in place.
After that, for best results, enter in purchases and transfers through our system for a better, more accurate inventory tracking experience.