Support
Accounts Payable
- AP Overview
- Purchase Orders
- How to Create Purchase Orders
Brewery Inventory Management
- Activating the Brewery Inventory Module
- Creating Products and Recipes
- Importing BeerXML Recipes
- Quick Start Guide
- Inventory
- Adding Items to Your Inventory
- Batches
- Brewing A Batch
- Creating a Quick Batch
- Packaging
- Defining Packaging Groups
- Packaging Up A Batch
- Setting Up a Packaging Group (Can Flat)
- Setting Up A Packaging Group (Kegs)
- Advanced Options
- SKU Multiplier
Digital Menus
Employee Management
Integrations
Log Book
Scheduling
Settings
Team Messaging
Training
List of Logbook Element Types
We currently allow for 10 different types of elements for your logbook forms. Each element has a purpose and allows for different types of data to be entered into it. This keeps your logbook entries nice and tidy, and allows for quick lookup of historical reports.
- Short Answer Box - This is your basic single line textbox, no restrictions on what can be entered into it. It will probably be the most common element you use in your logbook entries
- Paragraph - As the name implies, it allows for your user to type out a paragraph. Useful for describing in detail the days events, or procedures taken
- Dropdown Box - Create a single choice dropdown box for your user to select from
- Single Choice - This displays a group of 'Radio' boxes, similar to a dropdown box except all the available options are visible to the user
- Multiple Choice - Creates a group of 'Checkboxes', with the option of choosing more then one item
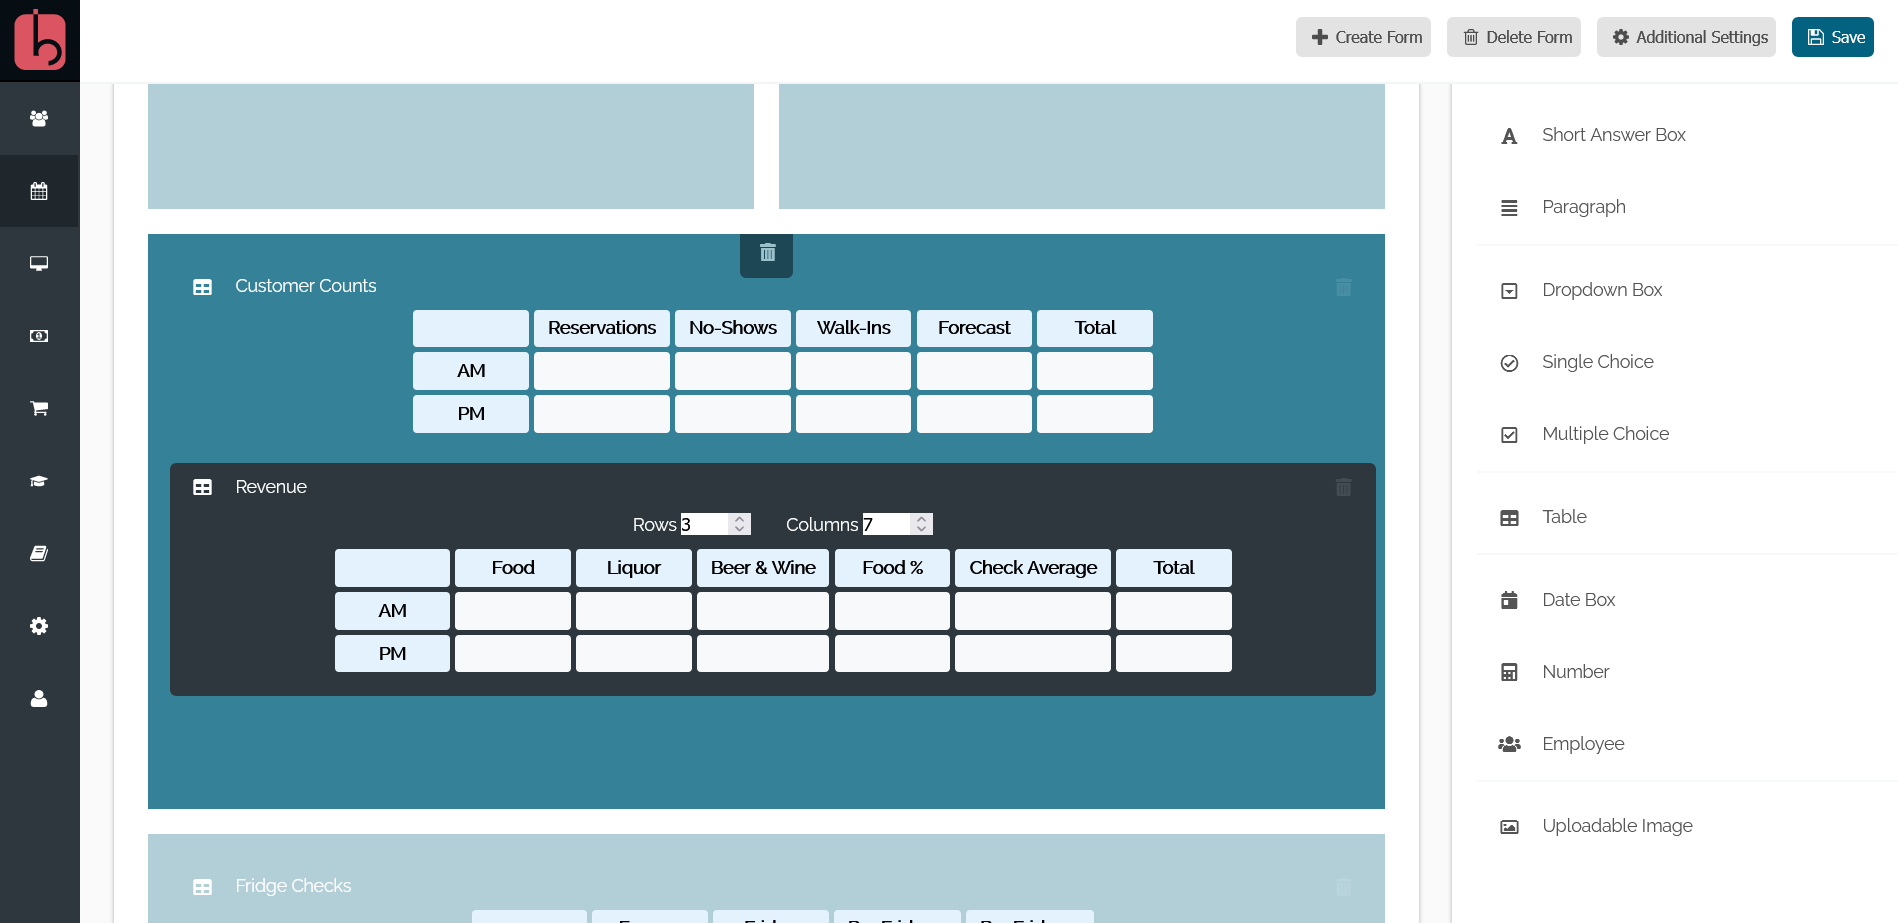
- Table - Create a table for more complex data entry. We'll go into more detail on this one below
- Date Box - Similar to the basic textbox, but this will display a calendar and output a date in YYYY-MM-DD format
- Number - Similar again to a basic textbox, but only allowing numbers to be entered
- Employee - Creates a 'Facebook-style' textbox that you can tag employees for the logbook entry. Useful for tagging employees in entries like customer complaints or employee recognition
- Uploadable Image - With our logbooks, you can upload an image from your laptop or mobile phone, and attach it to the logbook for your records.
Logbook Table

The most useful (we think!) feature we've included into our logbook module is the way you can create and manage a table for complex data entry. Clicking on the table element will show the options to increase/decrease the rows and columns for your table. Once you've got the table big enough, you can click each cell to make it a 'Header'. The header cells can run along the top, the sides, or both of your table. These header cells guide your employee on what data you want inside your table.
Tip: We've added additional functions to the table cells, such as automatically calculating the row and column totals. Check out the link to read more on how to set this up!


