Support
Accounts Payable
- AP Overview
- Purchase Orders
- How to Create Purchase Orders
Brewery Inventory Management
- Activating the Brewery Inventory Module
- Creating Products and Recipes
- Importing BeerXML Recipes
- Quick Start Guide
- Inventory
- Adding Items to Your Inventory
- Batches
- Brewing A Batch
- Creating a Quick Batch
- Packaging
- Defining Packaging Groups
- Packaging Up A Batch
- Setting Up a Packaging Group (Can Flat)
- Setting Up A Packaging Group (Kegs)
- Advanced Options
- SKU Multiplier
Digital Menus
Employee Management
Integrations
Log Book
Scheduling
Settings
Team Messaging
Training
Each product you create in BarSight needs at least 1 recipe in order for a batch to be created. Products can contain multiple recipes, allowing you to create variations of your recipes, and different batch sizes.
Product Management

On the main products & recipes page, you'll see a list of the different beers, their categories, and how many recipes you have listed under that same beer. If you are just starting out with BarSight, you'll see we've included a default sample recipe to help illustrate the format we use.
There are a few options available to you on this screen, you can:
-
Create a new product or edit an existing product
-
Import a BeerXML file into your BarSight account
-
Print an order sheet to make taking orders from your customers easier
-
Configure beer styles and categories
Edit Product
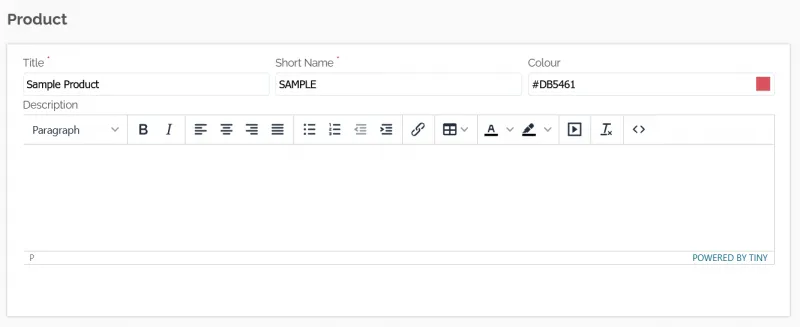
Enter some basic details for your product in the first box, the Short Name and Colour are helpful for you to quickly identify the batches for this recipe when managing your brewery on the Planning page
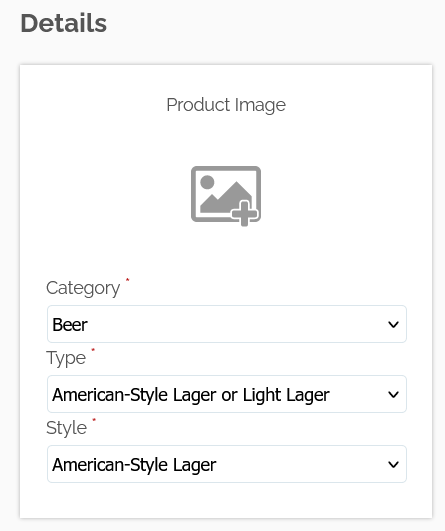
These fields are for the finer details of this beer, such as a display image (for the online sale portal) and what category this beer falls under, so you customers can find your different brews with ease.

A list of your recipes for this product, you can even create multiple recipe styles, such as double batches, experiments, or as you change ingredients over time. These recipes help structure your brewing process inside BarSight, and let the system know what ingredients to take out of inventory, what type of equipment to reserve, and what measurements need to be taken from the batches. If you are creating a new recipe, you can use the Copy Recipe From button to use one of your existing recipes as a template. If you build your recipes in another software (such as BeerSmith), you can even directly import the BeerXML files here.
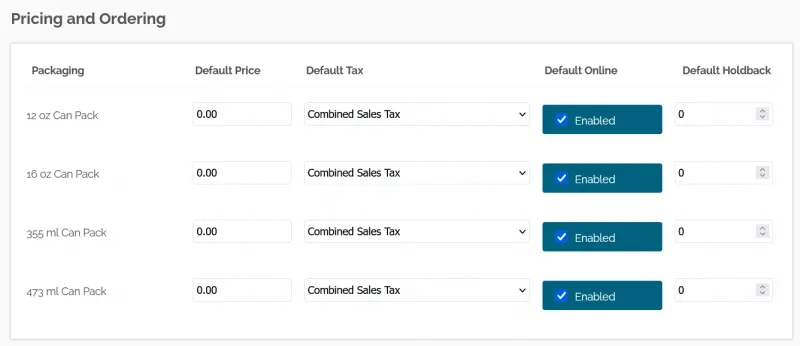
All of the different packaging groups you have set up, are listed here. You can set default sales prices, default sales tax categories, online portal status, and holdback quantity. These values can all be over-ridden when you a packaging a batch, this just sets the default to make life easier for you.
The Default Online option will define if this product is orderable online through your brewery sales portal (if you have enabled your sales portal), the Holdback option will quietly reserve the specified amount in your stock, preventing customers from ordering everything you have in stock - so you can keep a couple of cases in your taproom.
Building A Recipe
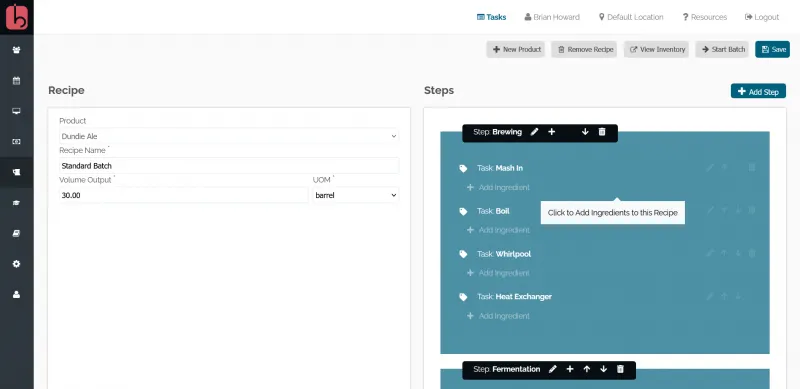
When you first start out with a recipe, on the left you will see the basic configuration inputs - recipe name, estimated output and unit of measure. The estimated volume of output should be somewhat close to what you imagine pulling out of your brite tanks and ready to be packaged. This value can be changed later, but just gives you and the system a general idea.
On the right side of your screen, you will see our recipe builder. We made our recipe builder to be as simple as possible, while also offering the flexibility required to manage complex brews, that's no simple feat!
Recipe Steps
We define recipe steps, as a batch moving from one tank to another. In a typical brewery setup, that would normally consist of 3 steps.
-
Brewhouse
-
Fermentation
-
Conditioning
If you plan on barrel-aging you brew, for example, that would be an additional step you would add. If you use unitanks, you could remove a step and just combine the tasks (explained in detail a few paragraphs down)
Step Configuration
Clicking on the edit button on a step will bring up this popup menu:
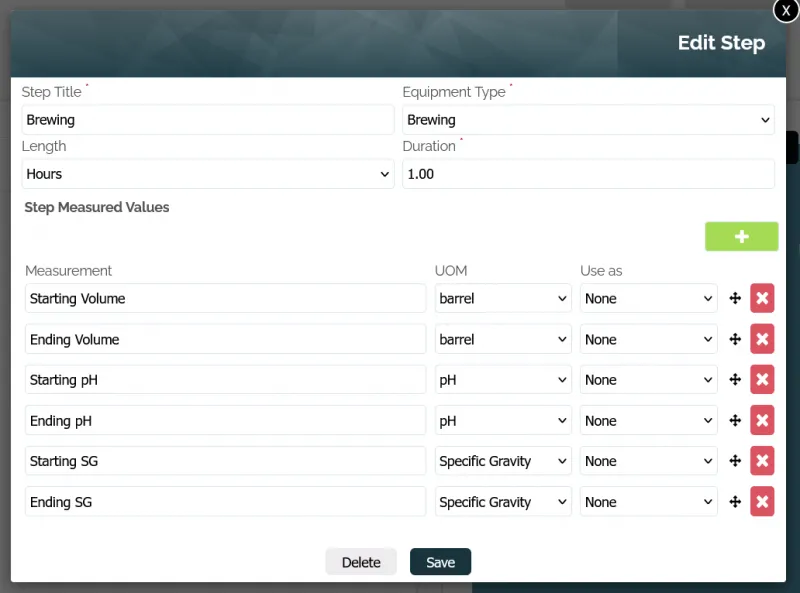
Make sure to pay attention to the Equipment Type dropdown, this defines what equipment BarSight will automatically try to allocate to this batch when you start brewing it. Your options are typically:
-
Barrel
-
Brewing
-
Conditioning
-
Fermentation
-
Lagering
-
Storage
-
Other
As long as you have setup your brewery location correctly with the right equipment, BarSight will be able to automatically assign a tank, including the duration (how many days or hours you'll need). Keep in mind, once you start a batch, you can change tanks and modify the duration as you go, these are just starting points for you.
Step Measurements
After you've configured what kind of equipment is required for this step, you'll be able to add in default inputs for your brewers to enter in measurements. These are single value measurements, such as water added, boil temperature, starting and ending specific gravity. By default we include a couple standard measurements, but you are able to remove and add your own.
Top Tip: Recording hourly or daily measurements are covered later in task measurements, so keep reading.
Recipe Tasks
Tasks are were you break down the individual actions you take to brew great beer. For the brewhouse step you would typically have:
-
Mash In
-
Boil
-
Hop Addition
-
Whirlpool
-
Heat Exchanger
You can add additional tasks or re-arrange as necessary so it makes sense for your staff and fits with your normal brewing practice. You can even add notes to help clarify and keep consistency between batches.
Task Measurements and Recordings
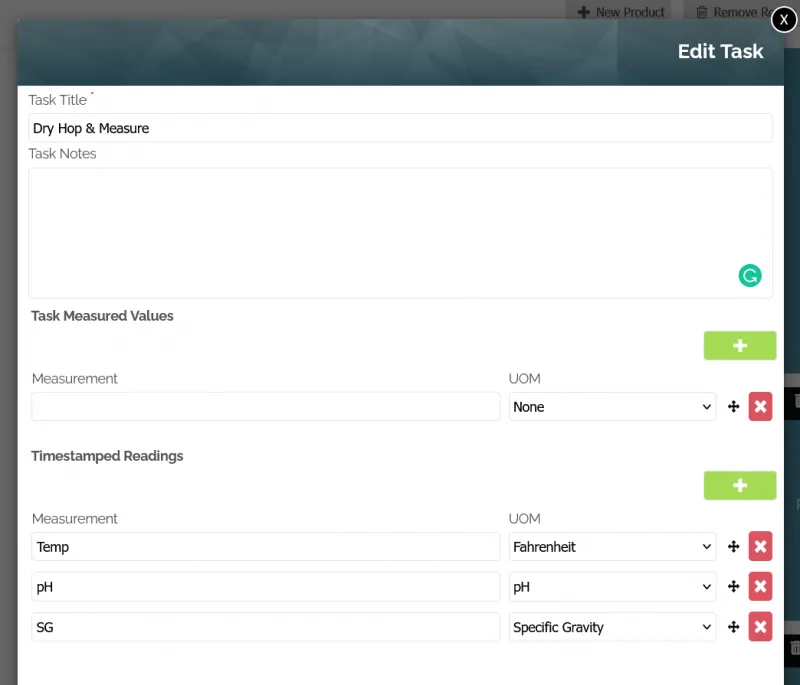
You can define standard measurements for tasks, just like a step as we explained previously. To allow your staff to record repeated measurements, such as temperatures and pH levels, over the course of a few days - you'll need to set those up as Timestamped Readings. That will allow the same measurement to be taken over and over again, and displayed in a table so you can track the progress as the beer is fermenting (for example).
Adding Ingredients
To begin tracking ingredients for your batches in BarSight, you'll add them in the most relevant task. So for mash in, you'd add your barely, malt, and other additives. Create different tasks to specify at what boil time you add in certain hops and how much (if you import a BeerXML file, you'll see what we mean), and add more hops during the fermentation task for dry hopping.
Tracking Consumables
You can even add consumables (such as screen filters, gaskets, or other one time use items) to a task, if you wanted to get better accuracy on the cost-per-litre (or cost-per-barrel) of your beer.
Start a Brew
With your recipe all built, ingredients and measurements set up, click Start Batch and define when you want to start brewing this beer. BarSight will take all the data you've entered, forecast your ingredient usage, and you will have the ability to clearly see if there are any scheduling conflicts with your equipment.