Our brewery inventory system is based around a simple, intuitive interface that enables you to easily manage your inventory from anywhere, at any time. We strive to balance ease of use with a robust and powerful database, to help you get started as quickly as possible we've included some tips in the following guide. Once you have activated the brewery inventory module for your BarSight account, use this guide to get up and running.
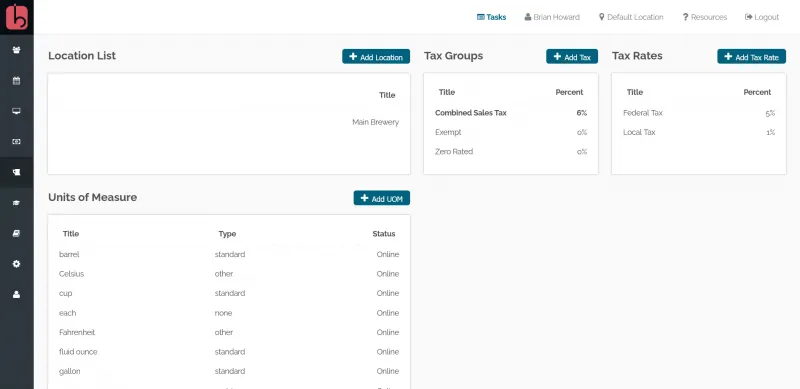
The first thing you should do is make sure the core settings for your brewery system are setup correctly. Navigate to the Brewery -> Settings page and you will see this screen.
Setup Your Main Brewery Location
You can have multiple breweries and storage facilities inside your account, but for now, let's just focus on setting up a single location. Click on the Main Brewery under Locations to bring up your first default location.
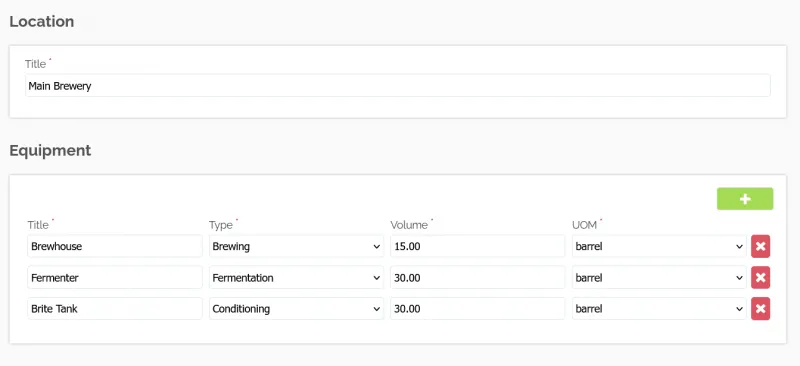
You can change the title of the brewery if you wish, but more importantly, this is where you add or change the equipment you have for your brewery. Add as many fermenters, brite tanks, unitanks, etc as you have in your brewery. Make sure to select the correct Type so the system can correlate the tank type to the recipe step type (we will get into that later). If your fermenter type is set to conditioning, when your recipe is looking for a tank to ferment in, it won't show up!
Verify the volumes and units on measure (UOM) are correct as well, the volumes will be used to track losses, splits, blends, and packaging amounts. You won't be able to get 45 bbl of beer out of a tank that only has 10 bbl of volume without some major witchcraft.
Setup Sales Taxes
By default, we include a standard 6% sales tax, before you start generating sales we recommend that you verify these tax amounts are setup correctly for your jurisdiction.
- If you have no sales tax (lucky you!), go ahead and just remove these items.
- If you only have a 5% federal tax, you can remove the Combined Sale Tax Group, and create a new Tax Group called 'Sales Tax' for example, and only include the federal tax rate.
- If your local sales tax is more than 1% or if your sales tax system is structured differently (like us in Canada), the best bet is to create a new tax rate for each separate tax you need to pay (such as GST, PST, HST, etc), and then create a new tax group for each combination that you typically charge customers. A tax group can contain one or more tax rates. In BC, for example, we would create these tax groups:
- 'Combined Sales Tax' would include both GST and PST tax rates created earlier.
- 'GST Only' and would include only the GST tax rate.
- Tweak your Units of Measure
We live in a complicated world of measuring, especially up here in Canada where we use both the metric and imperial systems frequently. If you are lucky enough to only need one or the other, you can disable certain UOM's by clicking on each item and removing the checkmark from the Enabled box.
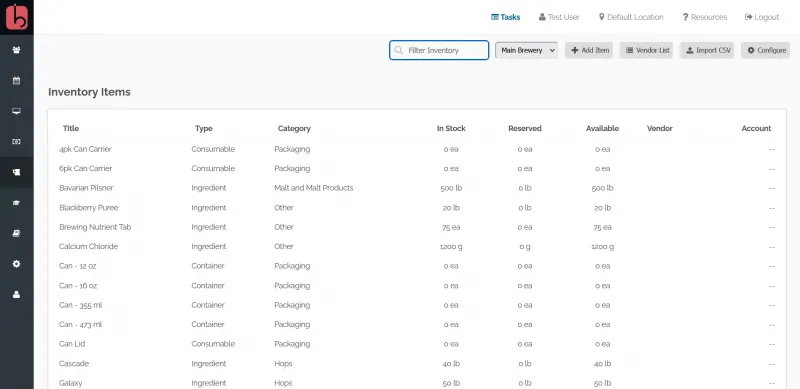
Now lets get into the real meat and potatoes of the brewery inventory system. Navigate to Brewery -> Inventory to see your inventory list. We actually go into a more in-depth look at each option and function of the inventory module here, so for now this will be a quick overview.
Import from Another System
If you are coming to BarSight from another inventory system, you might have an excel type document (such as a CSV) of your ingredients and materials. To make things easier, we've added an option for you to import that document right into your BarSight account.
Create Inventory Manually
If your inventory is small, or you have no system setup previously, you can quickly create inventory items manually. Just click the Add Item button and you will see the screen below.
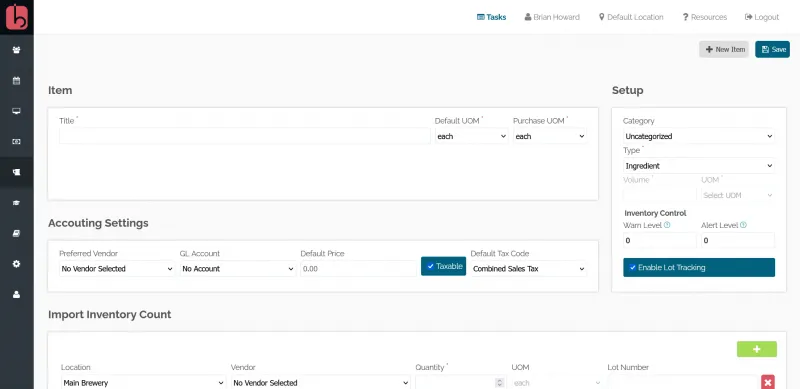
Pay attention to these 3 crucial inputs to get your item setup correctly:
- Item Title
- Default UOM
- Item Type
Ingredients are used in batches and recipes for your raw ingredients such as hops and malt
Consumables are used in batches, recipes, and even packaging. This can include items such as filters used in the brewing process, canning lids, and labels.
Containers are the actual vessels of which you package your beer into, such as cans, bottles, or kegs. When you select container as the item type, you must also define the volume and UOM of the container.
Deposits are for things such as pallets or trays that you include in your sales orders to your customers and are wanting to keep a running tally of.
With your ingredients in place, you will now be able to start creating your products and recipes. Navigate to Brewery -> Recipes inside your BarSight account and you will see this screen.

We've included a couple of examples of beer styles (ales, lagers, IPAs, etc), but if you would like to expand or customize your list, click on the Configure button. Otherwise, just click on the New Product button to get started.
Insert your product name, category, type, and style. Choosing different colours for your products helps you easily recognize your different brews when on the planning screen, which you will see later. The next screen after you click Save will be your recipe setup screen.
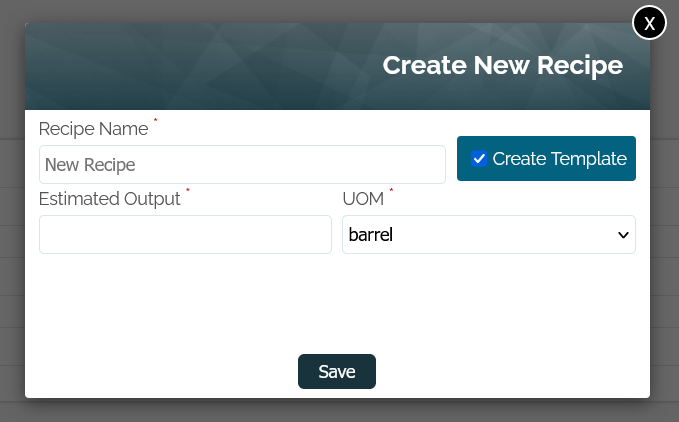
The same product can have different variations of recipes, you might have a double batch recipe, a recipe with substituted ingredients, or a progression of different trials. To start off, we usually recommend just calling it 'Standard Batch' and estimating the final output volume. By selecting the Create Template box, BarSight will include the standard 3 steps of a beer recipe (Brew, Ferment, and Condition) as well as a few of the traditional steps. We recommend you leave this checked for the first few recipes you create to see how we format things. If you are hardcore, or in a different industry, you can uncheck this box to start off with a blank recipe.
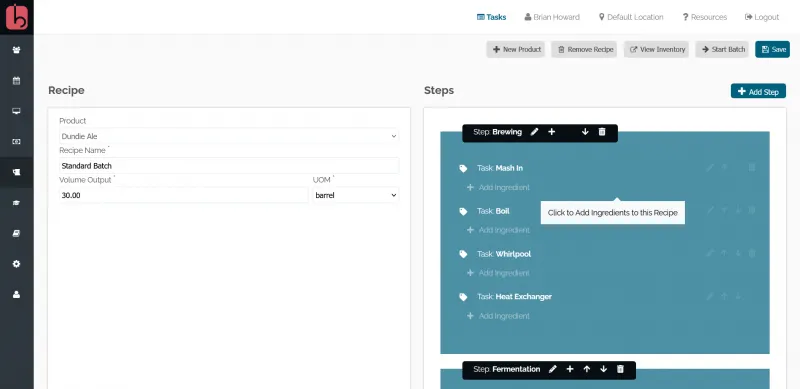
You will see your 3 steps on the right, with the tasks inside. A step basically correlates to a tank/equipment in your brewery. The tasks inside each step are actions that you do while the beer is inside the tank/equipment.
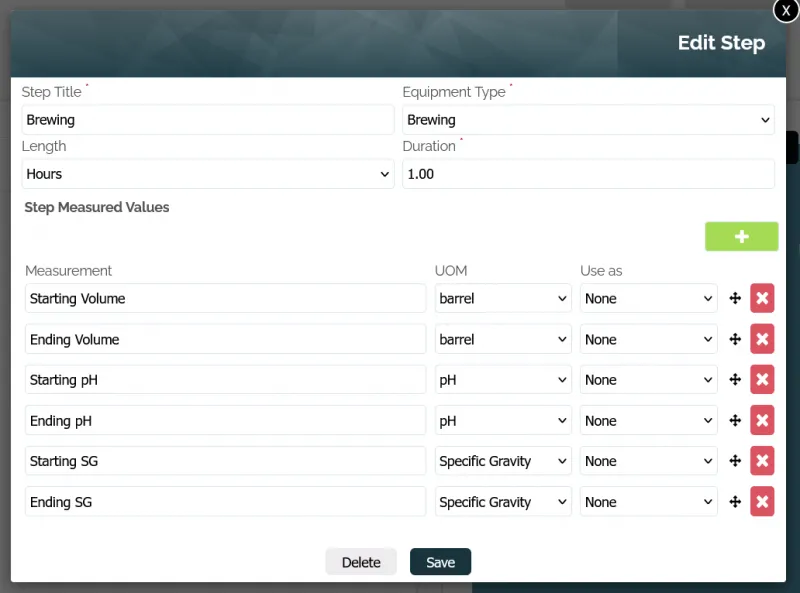
Edit or create steps for your recipe, making sure to pay attention to the dropdown for Length, and Duration. The system will use these values to accurately estimate and reserve your tanks when you start a new batch of this recipe.
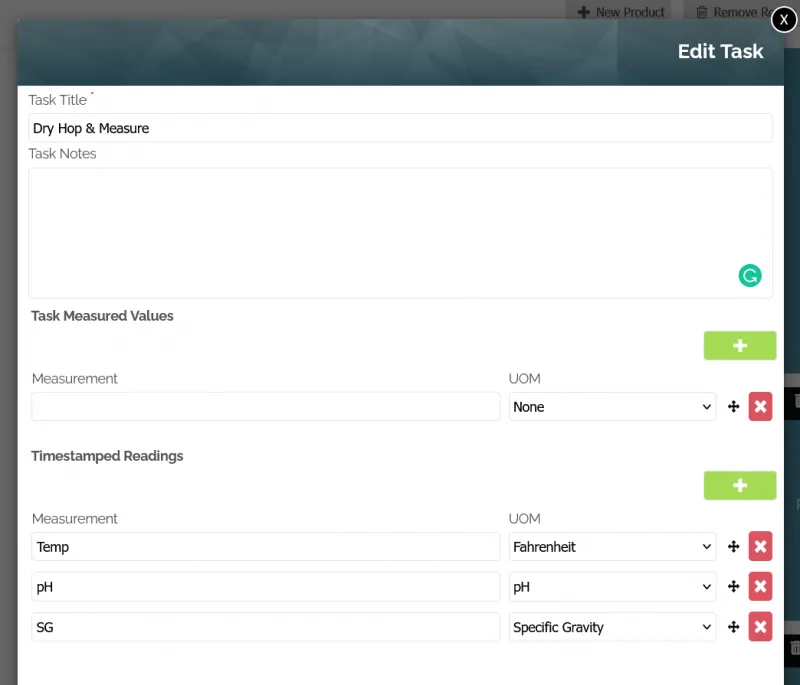
Add ingredients to the tasks, or create/edit the tasks shown on the screen to reflect what you need to do for your recipe. You can add notes and measurements to record values (such as pH levels, water added, sparge temperatures, etc) to tasks or steps, whichever makes the most sense for you. If there are values that you want to monitor on a daily/hourly basis, you will find those inside a task under the heading of Timestamped Readings.
This will allow you to record those values (such as Temp, pH, and Specific Gravity) at repeated intervals, they will be saved with the current date & time, and who saved them.
Get Brewing
When your recipe is all done, it's time to get brewing! Click the Start Batch button and fill out the form to get started.
A new batch will be created in your planner, the system will automatically reserve the tanks in your brewery based on the steps and durations you have setup in your recipe. Head over to our guide to brewing a batch to read all about the awesome features of our batch screen inside our brewery management software.
If you have existing BeerXML files (usually from software like BeerSmith), you can even import those files directly into BarSight. Read our guide on importing BeerXML files to learn how.